Creating a simple blog API - Part 2
Connecting your Node server to MongoDB Atlas


This is a series and for a complete experience, kindly access part one of the series here.
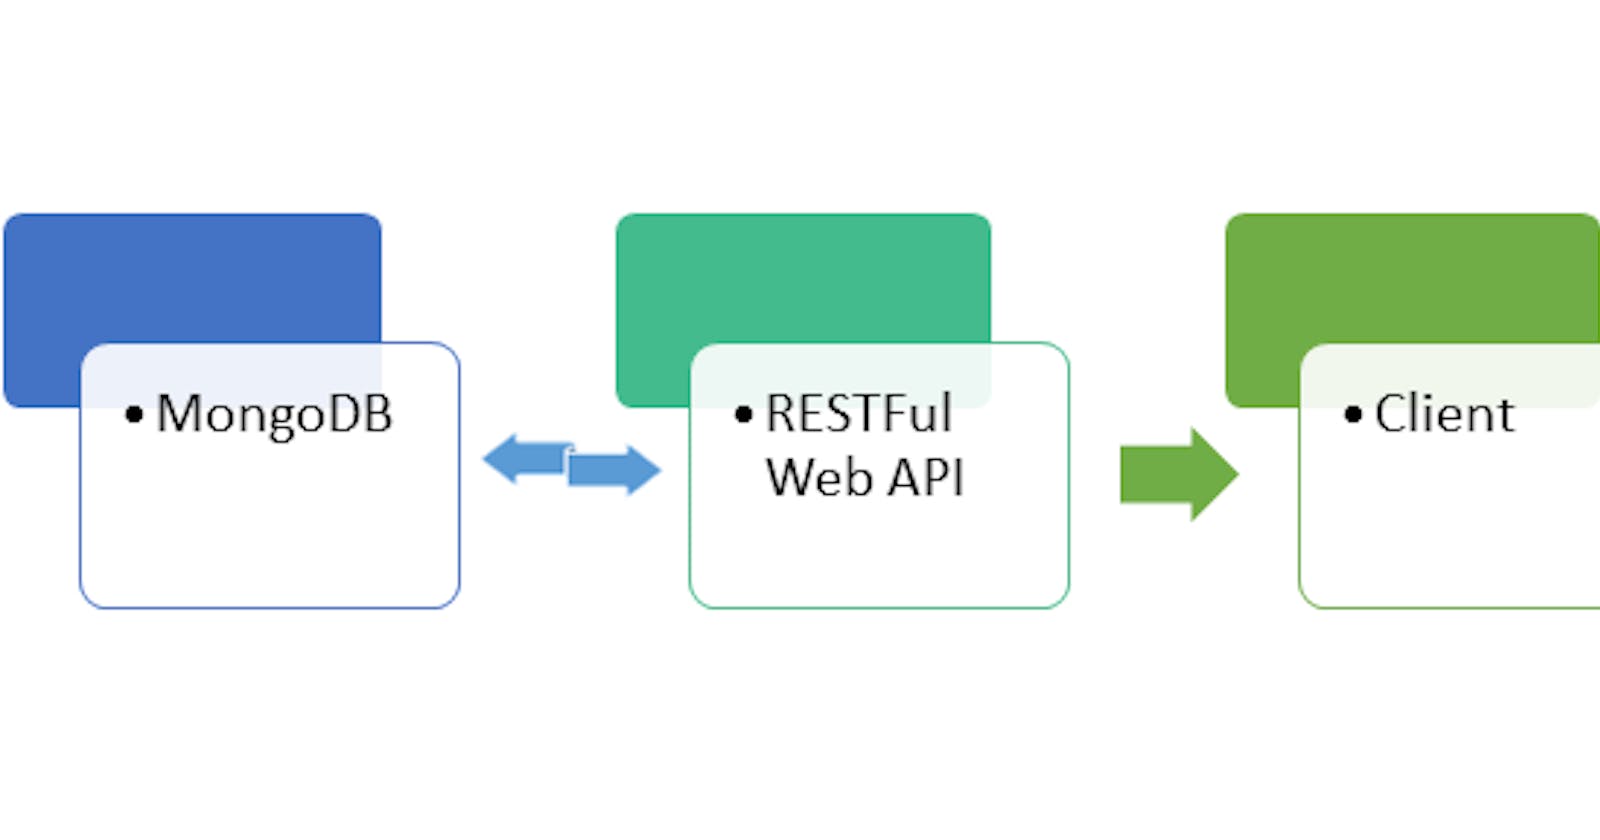
Sequel to the earlier post, you need to be able to store all the necessary details ranging from who can access, create, delete, and update a blog post; to the CRUD functionality for your API. The database is needed to enable you to store users' data and provide access to authorized and unauthorized users based on the logic of your application.
To begin, you will be using MongoDB as your database and Mongoose to create a connection between MongoDB and Node.js for this application.
You can read more about mongoose here.
For MongoDB, you will be using MongoDB Atlas; a managed MongoDB in the cloud. Register here if you don't have an account yet.
On Atlas, do the below or access the documentation for the guide:
Create an account
Create a project
Create a cluster
Add your connection IP Address to the IP access list
Create a database user for your cluster
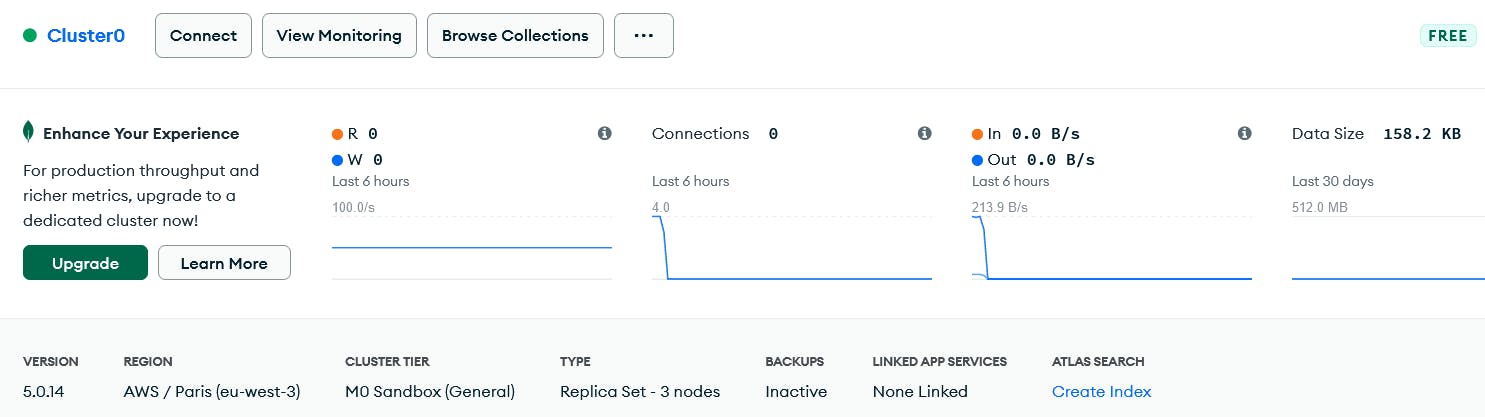
When you access the cluster, you will see the below image:
Click on Connect option
Select Connect your application option
Select Node.js as the driver, copy and save the connection string provided by MongoDB
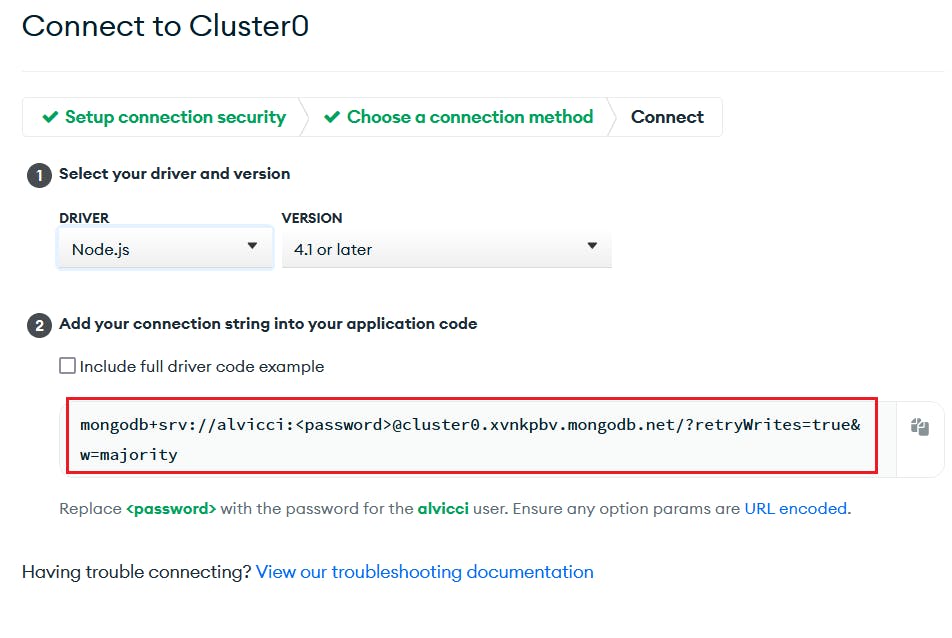
CONNECTION TO YOUR NODE APPLICATION
Having done the above steps, it is now time to connect your application to your online database (the copied collection string).
In your
config.envfile, update it with the collection string and edit it to have the name of your database. For me, the name will beblogging_api.The password here is to not expose the connection string password in our application but accessed as an environment variable.
  MONGO_URI = mongodb+srv://alvicci:<password>@cluster0.xvnkpbv.mongodb.net/blogging_api?retryWrites=true&w=majority
  PASSWORD = test123
Install the mongoose package by running
npm install mongoosein your terminal.In your
configfolder, create a file nameddatabase.jsand add the following:const mongoose = require("mongoose"); const DB = process.env.MONGO_URI.replace("<password>", process.env.PASSWORD); const connectionToMongoDB = async () => { try { mongoose.set("strictQuery", true); const conn = await mongoose.connect(DB); console.log(`MongoDB connected successfully: ${conn.connection.host}`); } catch (error) { console.error(error); process.exit(1); } }; module.exports = connectionToMongoDB;Import the database configuration into your
server.jsto connect to the DB.const app = require("./src/app"); const dotenv = require("dotenv"); dotenv.config({ path: "./config./config.env" }) const connectionToMongoDB = require("./config/database"); connectionToMongoDB(); const PORT = process.env.PORT || 3000; app.listen(PORT, () => { console.log(`Server is listening on localhost:${PORT}...`); });Now, run
node server.js.You should get something like the below:

Cheers! You have successfully connected to your MongoDB Atas!!
cover-image credit: codeproject.com